
Most kids don’t quit a build because it’s too hard. They quit because nobody has shown them what to do when they get stuck.
A wobbly tower, a missing piece, or a car that won’t roll can feel like the end of the project. It doesn’t have to. With the right routines, building toys for problem solving teach kids ages 5 to 12 to deal with being stuck. That is a skill they will use in homework, sports, and friendships.
This guide does not cover math lessons or advanced building techniques. It covers habits: how kids think when something goes wrong. You’ll get:
- The five problem types every builder faces
- Constraint cards that turn free play into real challenges
- The Stuck Ladder, a five-step routine for getting unstuck
- A failure-and-retry system kids can run on their own
- “Sabotage builds” that train debugging skills
- Facilitation scripts for parents and teachers
- A challenge bank for ages 5–7, 8–10, and 11–12
What Problem Solving Actually Looks Like at the Build Table
“Problem solving” sounds abstract. At the build table, you can see it happening. Here are the five habits that bricks train best.
| Habit | What You See at the Table | Where It Shows Up Later |
|---|---|---|
| Noticing | “The tower leans left.” | Spotting a mistake in a math answer |
| Breaking it down | Fixing the base before the roof | Splitting a school project into steps |
| Working with limits | Building a boat with only 30 pieces | Finishing a task with limited time or tools |
| Testing ideas | Rolling the car, changing one wheel, rolling again | Running a science experiment |
| Bouncing back | Rebuilding after a collapse | Trying again after a bad test score |
Each habit can be practiced. A child doesn’t have to be born a good problem solver. They improve through short, repeated practice, and bricks make that practice feel like play.
MINI-SUMMARY: You’re not teaching kids to build better models. You’re teaching them to handle getting stuck.
Step 1: Learn the Five Problem Types
All build problems fall into one of five types. Name them out loud. Once kids know which type they’re facing, they know where to start.
| Problem Type | The Question | Example Challenge | Best Starting Age |
|---|---|---|---|
| Fix It | What’s broken, and why? | Repair a bridge that sags in the middle | 5+ |
| Copy It | How was this made? | Rebuild a model from one photo | 5+ |
| Swap It | What can I use instead? | Finish a car when the wheels “ran out” | 6+ |
| Design It | What solves this need? | Build a holder for a pencil and an eraser | 7+ |
| Mystery | What’s hidden inside? | Figure out how a finished model’s moving part works without taking it apart | 9+ |
How to Use the Types
Write each type on an index card. Before a challenge, ask your child to pick the card that matches the problem. It takes five seconds and gets them thinking about the problem before they grab bricks.
Over time, kids start naming types on their own. “This is a Swap It problem. We don’t have a long gray piece.” When you hear that, it’s working.
Step 2: Make a Deck of Constraint Cards
Free building is fun. It isn’t always a challenge, though. Kids default to what they already know. Constraints push them past that.
Make a deck of 20 index cards. Each one sets a limit. Draw one or two cards before any build.
| Constraint Card | What It Forces |
|---|---|
| Only 25 pieces | Smart choices, no waste |
| No red or blue | Creative substitutes |
| Must hold a soup can | Strength and support |
| Must roll 3 feet | Wheels, balance, low friction |
| Must fold in half | Hinges and movement |
| Build it with one hand | Planning before acting |
| 5-minute timer | Quick decisions |
| Must fit in a mug | Working small |
| No flat plates | New ways to connect |
| A partner adds 3 random pieces you must use | Adapting to surprises |
Stack the Difficulty
- Ages 5–7: One card per build
- Ages 8–10: Two cards
- Ages 11–12: Three cards, including one “surprise” card drawn halfway through
That surprise card matters. Real problems change halfway through. Kids who learn to adjust mid-build adapt better when plans fall apart in real life.
🎉 Want more parts for your constraint challenges? Explore STEM and creative sets at ModelBuilder.
Step 3: Teach the Stuck Ladder
Getting stuck is part of the process. Kids just need a set of steps to follow when it happens. The Stuck Ladder gives them five rungs to climb, in order, before they ask an adult for help.
| Rung | Action | What Your Child Says |
|---|---|---|
| 1. Look again | Step back. Look from the side, top, and bottom. | “Where exactly is it going wrong?” |
| 2. Change one thing | Swap one piece or move one connection. Test it. | “What if I only change this?” |
| 3. Shrink it | Solve a smaller version first. | “Can I make just the base work?” |
| 4. Borrow an idea | Look at an instruction booklet, a past build, or a real object. | “How does a real bridge do this?” |
| 5. Ask for a hint | Ask for a hint, not the answer. | “Can you give me a clue?” |
Make It Visible
Print the ladder. Tape it to the wall above the build table. When your child says “I can’t do it,” point to the ladder and ask, “Which rung are you on?”
Rung 2 does most of the work. Kids often change five things at once and can’t tell which one helped. Changing one thing at a time is the same approach scientists and engineers use.
MINI-SUMMARY: Kids don’t need you to fix the build. They need a set of steps to follow.
Step 4: Build a Failure-and-Retry Routine
Collapses are part of the lesson. What matters is what happens in the 60 seconds after one.
The Three-Try Rule
Every challenge gets at least three attempts before anyone calls it “done” or “impossible.” Most kids give up after the first collapse. Three tries teaches them that the first try is just a starting point.
Keep a Retry Log
Give each child a simple notebook page with four columns:
| Try # | What I Changed | What Happened | Next Idea |
|---|---|---|---|
| 1 | — (first build) | Bridge sagged in the middle | Add a support underneath |
| 2 | Added a pillar | Held the can, but tipped sideways | Make the base wider |
| 3 | Widened base by 4 studs | Held the can for 30 seconds! | Try two cans |
Younger kids can draw a face for “What Happened”: happy, so-so, or sad. Older kids write full notes. Either way, they see that failure gives them information to use on the next try.
Run a 2-Minute “Crash Report”
After a big collapse, pause before rebuilding. Ask three questions:
- “Where did it break first?”
- “What was pushing on that spot?”
- “What’s one thing you’ll change?”
Keep it quick and calm. Treat the collapse like a puzzle to figure out. Kids follow your tone. If you stay calm, they will too.
Celebrate the Best Failure
Once a week, give an award for the most useful collapse. The winner is whichever failure taught the family the most. Kids who used to hide their mistakes start showing them off.
Step 5: Run Sabotage Builds
Kids love this one. You build a small model with one hidden flaw. Your child’s job is to find it and fix it.
Software engineers call this debugging. Kids just call it fun.
How to Set One Up
- Build a simple model: a car, a gate, a tower, or a small machine.
- Plant one flaw. Don’t tell them what it is.
- Hand it over with one clue: “It’s supposed to roll straight.”
- Your child tests, finds, and fixes the problem.
Sabotage Ideas by Difficulty
| Level | The Flaw | Clue You Give |
|---|---|---|
| ⭐ | One wheel missing its tire | “It wobbles.” |
| ⭐ | A tower with one loose brick near the base | “It falls when you touch it.” |
| ⭐⭐ | One wheel on a shorter axle | “It turns left by itself.” |
| ⭐⭐ | A hinge placed upside down | “The door won’t close.” |
| ⭐⭐⭐ | Gears placed so they jam | “The crank gets stuck.” |
| ⭐⭐⭐ | Wrong color in a pattern, deep inside | “Something doesn’t match the photo.” |
Flip the Roles
Once kids get good, let them sabotage your builds. To plant a good flaw, they have to understand exactly how the model works. You’ll be surprised how sneaky a 9-year-old can get.
MINI-SUMMARY: Fixing someone else’s mistake is excellent practice for spotting your own.
Step 6: Facilitate Without Fixing
This is the hardest step for adults. When a child struggles, most parents and teachers want to step in. Building for them stops the learning.
Count to Ten
When your child gets stuck, silently count to ten before you say anything. Many kids solve the problem by six or seven. If you speak at two, you take that moment away from them.
Swap Your Words
Small changes in language change how kids think about being stuck.
| Instead of… | Try… |
|---|---|
| “Here, let me do it.” | “Show me where it goes wrong.” |
| “Good job!” | “How did you figure that out?” |
| “That won’t work.” | “What do you think will happen? Test it.” |
| “You’re so smart.” | “You kept trying different ideas. That worked.” |
| “Just follow the instructions.” | “Which step looks different from your build?” |
| “Don’t worry, it’s fine.” | “What will you change next time?” |
Use a Hint Ladder Too
When your child asks for help (Rung 5), give the smallest hint that works. Move up only if they’re still stuck after a real try.
- Point: “Look at this area.”
- Ask: “What’s holding this part up?”
- Compare: “How is this different from your tower that stood?”
- Show: Demonstrate on a separate piece, not their build.
Never touch their model unless they ask you to. The build is theirs, and so is the solution.
For Teachers With a Full Room
You can’t count to ten for 24 kids at once. Use “Ask Three Before Me.” Before raising a hand, students check the Stuck Ladder, then ask two classmates. Most problems get solved before they ever reach you, and kids learn to coach each other.
Step 7: Pick Challenges by Age
Problem solving building toys work at every age. The challenge just has to match where your child is. Use this bank as a starting point.
Ages 5–7: Short Wins
These kids need fast feedback. Keep challenges under 15 minutes.
- Rescue Wall: Build a wall that stops a rolling ball. Test it. Make it stronger.
- Missing Wheel: Finish a car with only three wheels. How does it still roll?
- Animal Home: Build a house that fits a small toy animal, with a door that opens.
- Copy Me: Copy a 6-piece model from a photo.
Ages 8–10: Real Constraints
This group can handle two constraint cards and longer tests.
- Book Bridge: Span the gap between two books 8 inches apart. Hold a juice box.
- Marble Slow-Down: Build a ramp that makes a marble take at least 5 seconds to reach the bottom.
- Fold-Up Shelter: Build a tent that folds flat and pops back open.
- Sabotage Swap: Plant a flaw for a sibling or classmate to find.
Ages 11–12: Open-Ended Design
Older kids want problems that feel real. Give them a user and a goal.
- Grandma’s Gadget: Design something that helps a family member with a real daily task, such as a phone stand or a key holder.
- Mystery Mechanism: Study a finished technical model. Sketch how the gears connect, then build a simpler version from memory.
- Budget Build: Assign a “price” to each piece type. Build the strongest tower for under 50 points.
- Design Brief: Write a one-paragraph problem. Swap with a partner. Solve each other’s brief.
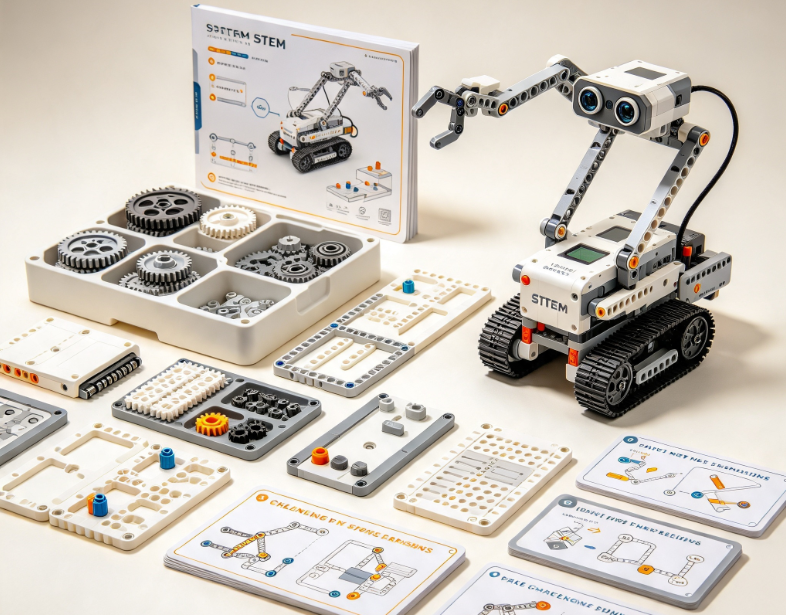
🏆 Older builders ready for gears, motors, and mechanical challenges? Browse technical building toys for problem solving at ModelBuilder.
SAFETY FIRST: Small bricks are a choking hazard for children under 3. If younger siblings are around, build at a table and store parts in lidded boxes.
Step 8: Bridge the Habits to Real Life
Kids won’t automatically use these habits outside the build table. You have to connect them. The easiest way is to reuse the same words.
Use the Same Language Everywhere
| Real-Life Moment | Build-Table Language |
|---|---|
| Stuck on a homework problem | “Which rung of the Stuck Ladder are you on?” |
| Lost a soccer game | “Let’s do a crash report. What’s one thing to change?” |
| Messy room, no idea where to start | “Shrink it. Just do the desk first.” |
| Argument with a friend | “What’s the problem type? Fix it or swap it?” |
| Science project didn’t work | “Change one thing and test again.” |
Ask the Transfer Question
Once a week, at dinner or in the car, ask: “Where did you use a building trick today, but not with bricks?” The first few weeks, you’ll get shrugs. Then one day you’ll hear, “I shrank my spelling list into three parts.” That’s when the habit has carried over.
How to Tell It’s Working
Finished models look nice, but they won’t show you whether problem-solving skills are growing. Watch for these signs instead.
Early signs (weeks 1–4):
- Fewer “I can’t” moments
- Your child looks at the Stuck Ladder before asking you
- Collapses get a groan, not tears
Middle signs (months 2–3):
- They change one thing at a time without being reminded
- They name problem types on their own
- They ask for hints, not answers
Strong signs (month 4+):
- They design their own constraint cards
- They plant clever flaws in sabotage builds
- They use build language for non-building problems
Track one sign per week in a shared family or class notebook. Progress is easier to believe when it’s written down.
“But What If…” Real Concerns, Answered
“My child melts down when things break.”
Start smaller. Use 10-piece challenges with near-certain success. Add the Three-Try Rule only after a few easy wins. Praise the effort out loud: “You rebuilt it twice. That’s how builders work.”
“We don’t have time for this.”
One challenge takes 15 minutes. Two sessions a week is enough to build these habits. Swap one screen session for one constraint card.
“I’m not a builder myself.”
You don’t need to be. Your job is to ask questions, not to know answers. The Stuck Ladder and hint ladder do most of the coaching for you.
“My kids only want to follow instructions.”
That’s fine at first. Then add a twist: finish the official model, then draw one constraint card and modify it. Instructions teach technique. Constraints teach problem solving. Kids need both.
“Do I need expensive sets?”
No. A mixed collection of standard bricks, plates, a few wheels, and some hinges covers most challenges in this guide. Add technical parts later for older kids.
Build Kids Who Keep Trying
The best problem solving building toys don’t solve anything for your child. They give them a safe place to get stuck, try again, and figure it out on their own. Name the problem type. Draw a constraint card. Climb the Stuck Ladder. Log every retry. Run a sabotage build now and then. Then step back and count to ten.
Start this week with one constraint card and the Three-Try Rule. That’s all you need to begin.
🧱 Stock your challenge table: Shop ModelBuilder
Got a great sabotage build or a “best failure” story? Share it with other building families and teachers. Join the community!
Frequently Asked Questions
What are the best building toys for problem solving?
The best building toys for problem solving are open-ended brick sets with a mix of standard bricks, plates, wheels, axles, and hinges. These parts let kids test ideas, fix failures, and work around limits. For ages 11 and up, add gears and technical pieces for mechanical challenges. Sets that can be rebuilt many ways teach more than single-model sets.
How do problem solving building toys help kids outside of play?
Problem solving building toys train habits like noticing details, breaking big problems into small steps, testing one change at a time, and bouncing back from failure. When parents and teachers use the same language at home and school, kids start applying these habits to homework, sports, and everyday challenges.
What age should kids start problem-solving building challenges?
Most kids can start simple Fix It and Copy It challenges around age 5. Constraint cards and retry logs work well from ages 7 to 8. Open-ended design briefs and mystery mechanisms suit ages 11 to 12. Always keep small bricks away from children under 3.
How do I help my child without solving the problem for them?
Wait ten seconds before you speak. Then use a hint ladder: point to the problem area, ask a question, compare it to a past build, and only demonstrate on a separate piece as a last step. Avoid touching their model unless they ask. Praise their process (“You tried three ideas”) instead of the result.
Can teachers use these challenges in a classroom?
Yes. Post the Stuck Ladder on the wall, give each table a deck of constraint cards, and use the “Ask Three Before Me” rule to cut down on hand-raising. Retry logs double as quick assessments, since they show how each student thinks, not just what they built.