
Most new builders follow the same curve. Set one is exciting. Set two is fun. Set three sits half-built for a month. Then the bricks go into a bin, and the hobby quietly ends.
The cause is rarely the sets. The missing piece is a system. Creative construction sets stick when you treat building as a practice, with a routine, a next goal, a community, and a plan for what you buy and keep.
This guide is for adult builders who want a lasting way to unwind, parents who want a STEM habit that outlives one rainy weekend, and collectors who want a shelf that grows with purpose. You’ll learn how to:
- Build a weekly routine that survives busy months
- Move through five clear skill levels
- Join the building community step by step
- Set up a collecting plan that grows without clutter
- Follow a 12-month roadmap from first set to original designs
Why Building Hobbies Stall After Three Sets
Spot the problem before you fix it. Most hobbies stall for one of four reasons:
- No fixed time. Building happens “when there’s time.” There never is.
- No next goal. You finish a set and don’t know what comes next.
- Setup friction. The bricks live in a closet. Getting them out takes 15 minutes, so you skip it.
- Budget shock. You buy three big sets in one month, then feel guilty and stop.
Every section below targets one of these four. Fix them and building becomes part of your week, not a phase.
QUICK WIN: Pick the one reason above that sounds most like you. Read that section first.
Step 1: Build a Routine That Survives Busy Weeks
Motivation doesn’t sustain a hobby. Routine does. The goal is to make building the easy default on certain nights.
Anchor Building to Something You Already Do
Tie your session to an existing habit. Habit researchers call this “habit stacking.” It works because the old habit acts as a trigger.
- “After the kids go to bed on Tuesday, I build.”
- “Sunday after breakfast is family build time.”
- “After my Friday call ends, I do one instruction page.”
Be specific. “I’ll build more” fails. “Tuesday, 9 p.m., at the desk” works.
Set a Minimum Session
Long sessions sound great. They’re also the first thing you cancel. Instead, set a minimum so small you can’t say no.
The one-page rule: Your minimum is one page of the instruction booklet. That’s often 5 to 10 minutes. Most nights, you’ll keep going. On hard nights, one page still counts. The streak stays alive.
Stop Mid-Step on Purpose
Writers use a trick: stop mid-sentence, so tomorrow starts easy. Builders can do the same.
End your session halfway through a step, with the next pieces already pulled out. Next time, you sit down and snap them in within seconds. No “where was I?” moment. No warm-up.
Keep a “Ready Station”
Setup friction kills more hobbies than boredom. If you have the room, keep one small table or desk corner where a build can stay out between sessions. A large cutting board or tray works if you need to clear the table for dinner. Slide the whole build onto a shelf, then slide it back.
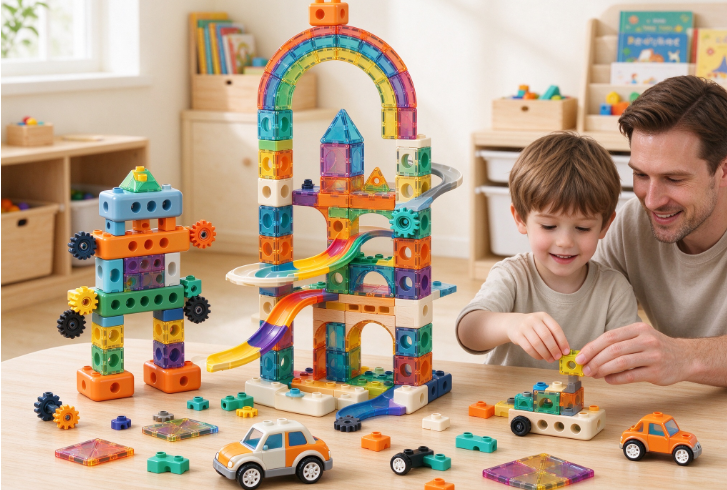
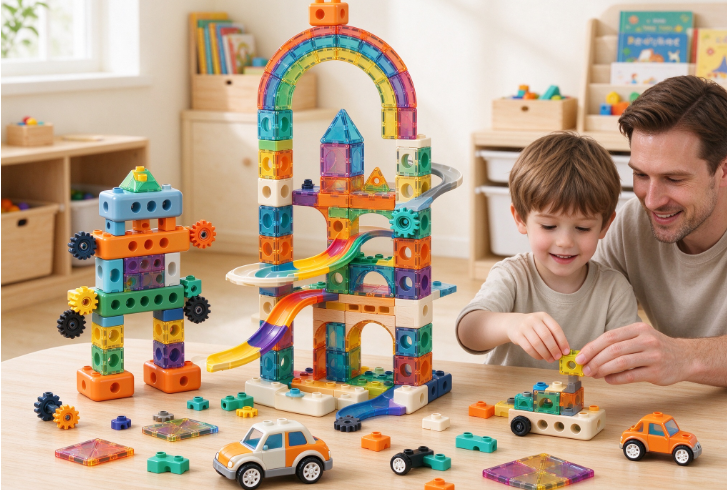
For families: Put the ready station somewhere visible, like the living room. Kids drift over and join without being asked. That beats a scheduled “STEM hour” that feels like homework.
Track It Lightly
Keep a simple log. A notebook, a notes app, or a calendar sticker works. Write the date, the set, and minutes built. After eight weeks, look back. Most builders are surprised by how much time they’ve put in, and how much calmer those evenings felt.
Step 2: Follow a Five-Level Skill Ladder
A hobby without progression gets stale. A clear ladder gives every set a purpose: it moves you up a rung.
| Level | Name | What You Do | Typical Set Size | Milestone to Move Up |
|---|---|---|---|---|
| 1 | Follower | Build official sets by the booklet | 500–1,500 pieces | Finish 3 sets without a major rebuild |
| 2 | Modifier | Change parts of official sets (colors, interiors, extra detail) | 1,000–2,500 pieces | Make one change you’d show someone |
| 3 | Kitbasher | Combine parts from 2+ sets into something new | Mixed parts | Build one model from at least two sets |
| 4 | Designer | Plan and build original models from scratch | Bulk parts + sets | Finish an original build over 300 pieces |
| 5 | Publisher | Document your design so others can build it | Any | Share building steps or a parts list online |
How to Move Up Each Level
Level 1 to 2: Start small. Swap a roof color. Add furniture to an empty room. Light up a building interior. Modifying shows you how a designer’s choices work.
Level 2 to 3: Take two sets that share a theme, like a city vehicle and a shopfront. Combine them into one street scene. You’ll learn which parts work across builds.
Level 3 to 4: Pick a real object near you, such as your coffee maker, your car, or your street’s corner store. Build it at a small scale first. Real objects give you a clear target.
Level 4 to 5: Free digital building programs let you rebuild your model on screen, list parts, and create step images. Publishing your instructions is the clearest sign you’ve mastered your design.
There’s no rush. Many happy builders stay at Level 1 or 2 for years. The ladder isn’t a test. It’s a menu for when you want something new.
Use Complexity as Your Guide
When choosing your next set, aim one step past your comfort zone. If your last build was 1,200 pieces with simple walls, try 1,800 pieces with angled roofs or a working mechanism. Too easy feels boring. Too hard feels like work. One step up keeps it relaxing.
Browse sets by difficulty at ModelBuilder to find your next rung.
Step 3: Plan a 12-Month Building Calendar
A calendar fixes “no next goal” for good. You always know what’s coming, and you spread spending across the year.
| Months | Focus | Why It Works |
|---|---|---|
| Jan–Feb | One large “anchor” build | Long nights, fewer plans. Good for a 2,500+ piece set. |
| Mar–Apr | Skill month: try one new technique | Fresh start energy. Pick one: hinges, curves, or mechanisms. |
| May–Jun | Family STEM builds | School wraps up. Vehicles and machines keep kids busy. |
| Jul–Aug | Kitbash or original design | Lighter summer schedule. No booklet needed. |
| Sep–Oct | Community project or challenge | Online groups launch fall contests. Join one. |
| Nov–Dec | Seasonal and gift builds | Winter villages, holiday scenes, building with family visitors. |
Make It Personal
Swap months to fit your life. A teacher might do the anchor build in July. A parent with a December birthday might move gift builds earlier. What matters is that each month has one clear job.
Tip for collectors: Leave one “open slot” each year for a surprise limited release. Planned spending elsewhere means you can grab it without guilt.
Step 4: Budget Like a Long-Term Builder
Big sets cost real money. Hobbies end when spending feels out of control. A simple budget keeps it fun.
Use Cost Per Hour, Not Cost Per Box
Box prices look big. Hourly cost tells a different story.
A 2,000-piece set that costs $150 and takes 12 hours to build costs $12.50 per hour. That’s often less than a movie night for two. And unlike a movie, you keep the result on your shelf.
Add hours spent modifying or rebuilding, and the cost per hour keeps falling. This is why creative construction toys that you can take apart and reuse give you more value over time.
Set a Monthly Hobby Budget
Pick a fixed monthly amount. Let it roll over. If you spend nothing in March and April, you can afford a bigger set in May. This “hobby fund” approach stops impulse buys and makes larger sets feel earned.
Watch the Buying Windows
Plan bigger purchases around:
- Holiday sales (Black Friday, end-of-year)
- New release launches for themes you collect
- Birthdays and gifting seasons, where you can add sets to a wishlist
The 48-hour rule: Found a set you want right now? Add it to your cart and wait 48 hours. If you still want it, buy it. If you forgot about it, you saved money. LIMITED releases are the exception. If it fits your collection plan and stock is low, act.
Step 5: Join the Building Community, One Step at a Time
Community is what turns a solo pastime into a lasting hobby. Builders who share their work stay with the hobby longer. Feedback brings new ideas, and deadlines bring motivation.
Many people feel shy about joining. So start small, using this ladder.
The Community Ladder
- Watch. Follow a few building forums, hobby subreddits, or social accounts. Look at what people build and how they talk about it.
- React. Leave one specific comment per week. “How did you get that curved roof?” beats “Nice build.”
- Share a work-in-progress. Post an unfinished build and ask one clear question. Builders love helping with real problems.
- Enter a challenge. Many groups run monthly theme contests. A theme and a deadline beat waiting for ideas.
- Collaborate. Join a group build, where each member creates one section of a larger scene.
- Lead. Host a small challenge, run a local meetup, or help a new builder.
You don’t need to reach step 6. Even steps 2 and 3 make a real difference.
Collaborative Builds Use Shared Standards
Group displays work because builders agree on basic rules. Common ones include:
- Base size: Many city and town layouts use 32×32 stud base plates, so sections line up.
- Road placement: Roads sit in the same spot on every base, so streets connect.
- Building height and scale: Matching scale keeps cars, people, and buildings in proportion.
Before you build for a group project, ask for the standards. Following them is the fastest way to get invited back.
Go Offline Too
Fan conventions and local brick clubs take place across the US and Europe. Many welcome builders who use alternative brands. Meeting builders face to face, seeing big layouts in person, and trading parts can reignite your interest after a slow stretch.
For families: Fan events are great days out. Kids get to see huge builds and often take part in free building areas. Many come home with ideas for months.
Step 6: Build a Collection Strategy
Without a plan, collections become clutter. With a plan, every new set adds to something bigger.
Write a One-Line Collection Focus
Define what you collect in one sentence. It acts as a filter for every purchase.
- “Modern city buildings at minifigure scale.”
- “Classic vehicles that fit one shelf.”
- “Large architecture models, one per year.”
- “STEM machines my kids can rebuild.”
If a new set doesn’t fit the sentence, skip it or flag it as a one-time exception.
Measure Your Display Space First
Measure your shelves before you buy. Write down the width and depth of each display area. Then check set dimensions on the product page before adding to cart.
Many collectors find they have room for six large sets, not the twenty on their wishlist. Knowing that early changes what you buy.
Use the Keep, Cycle, Part Out Rule
Every finished set gets one of three labels:
- KEEP: Stays built and on display. Your best and most meaningful pieces.
- CYCLE: On display for a season, then boxed with instructions and rotated out.
- PART OUT: Taken apart for your parts library, feeding Level 3 and 4 builds.
This keeps your shelves fresh and your parts supply growing. It also stops the “everything stays forever” problem that fills spare rooms.
Keep a Simple Inventory
A spreadsheet is enough. Track:
| Field | Why It Matters |
|---|---|
| Set name and number | Easy reordering of parts or instructions |
| Purchase date and price | Budget tracking, resale reference |
| Status (Keep / Cycle / Part Out) | Know what’s where at a glance |
| Box and instructions kept? | Big effect on collector value |
| Location | Find stored sets fast |
For LIMITED or EXCLUSIVE editions, save your order confirmation and take a dated photo of the sealed box. If you insure your collection or resell later, this record matters.
Creative construction sets with detailed builds and limited runs hold the most display value. Find display-focused sets at ModelBuilder that fit your collection focus.
Step 7: Keep Families Building Year After Year
Kids grow fast. A set that thrilled a 6-year-old bores a 10-year-old. Long-term family building means growing the challenge with your kids.
Match Sets to Age Stages
| Child’s Age | What Works | Adult Role |
|---|---|---|
| 5–7 | Small vehicles, simple houses, 200–500 pieces | Co-builder. Find parts, read steps together. |
| 8–10 | Machines, gears, 500–1,000 pieces | Helper. Step in only when asked. |
| 11–14 | Large models, working mechanisms, 1,000+ pieces | Teammate. Split sections and build side by side. |
Always follow age ratings. Keep small parts away from children under 3.
Start a Family Build Tradition
Traditions survive busy years better than plans do. Ideas that work:
- A yearly “big build.” One large set built together each winter break.
- A build birthday. Each child picks one set for their birthday and builds it with a parent.
- A family build wall. One shelf shows a model from each year. Kids see their own progress.
Let Kids Take the Lead
By 11 or 12, many kids are ready to choose, plan, and run their own builds. Let them. Owning the hobby is how it lasts into the teen years, when screens compete hardest.
Creative construction toys that teach gears, levers, and structure make these years count. Kids don’t just build. They learn how machines work, often without noticing.
Step 8: Push Through Plateaus
Every long-term hobby hits flat spots. Plan for them so they don’t end the hobby.
Signs of a plateau:
- Sets feel like chores
- You skip sessions without missing them
- Nothing on the wishlist excites you
Fixes that work:
- Switch lanes. If you build official sets, try one kitbash. If you design, follow a booklet for a change. New lanes feel like new hobbies.
- Change scale. Go tiny (microscale) or huge (a 3,000+ piece build). Scale shifts reset your brain.
- Take a planned break. Pick a “rest month.” Store the bricks. Most builders return hungry.
- Teach someone. Help a friend, a niece, or a coworker with their first set. Seeing it through fresh eyes brings back the fun.
Plateaus aren’t a sign the hobby is over. They’re a sign you’re ready for the next level.
Your 90-Day Starter Plan
Turn this guide into action with a simple three-month plan.
Month 1: Routine
- Pick your anchor day and time
- Set up a ready station
- Finish one set with the one-page minimum rule
Month 2: Progress
- Write your collection focus in one sentence
- Set a monthly hobby budget
- Try one Level 2 modification on your finished set
Month 3: Community
- Follow three building groups online
- Post one work-in-progress photo with a question
- Plan your next 12 months on the calendar
After 90 days, building isn’t something you try to fit in. It’s a regular, relaxing part of your week.
Build a Hobby That Lasts
Lasting hobbies run on systems, not willpower. Anchor building to a set time. Keep sessions small and the build station ready. Climb the skill ladder one rung at a time. Plan the year so every month has a job. Budget by cost per hour. Join the community step by step. Give your collection a clear focus, and keep families building as kids grow.
Do that, and creative construction sets stop being one-off purchases. They become a practice you’ll enjoy for years, at the table, on the shelf, and with the people who build alongside you.
🧱 Pick your next build: Explore ModelBuilder sets
Frequently Asked Questions
How much time do I need each week for a building hobby?
Less than you think. Two or three sessions of 15 to 30 minutes are enough to keep progress steady. The one-page rule helps. Even 5 minutes keeps the routine alive. Longer weekend sessions are a bonus, not a requirement.
Are creative construction sets worth it for adults?
Yes. Adults use them for stress relief, focus, and creative expression. Large architecture models, detailed vehicles, and original designs offer hours of challenge per set. When you calculate cost per hour, building often costs less than other evening hobbies, and you keep the finished model.
How do I find a building community if I’m new?
Start online. Follow building forums, hobby groups on social media, and contest pages. Comment on one build per week, then share a work-in-progress with a question. For offline options, search for brick clubs and fan conventions in your region. Many welcome builders of every level.
How do I stop my collection from taking over my home?
Write a one-line collection focus, measure your shelves before buying, and use the Keep, Cycle, Part Out rule. Rotate “cycle” sets into storage each season, and take apart sets you no longer display to grow your parts supply.
What are the best creative construction toys for kids who want to keep building long term?
Choose sets that grow with them. Ages 5–7 do well with small vehicles and houses. Ages 8–10 enjoy gears and simple machines. Ages 11–14 are ready for large models with working mechanisms. Always check age ratings and safety labels, and let older kids choose and lead their own builds.